

Refining the Twin Boost: Hard Clipping and the Benefits of Voltage Regulation
The Twin Boost continues to evolve, and each stage of its development brings fresh challenges and opportunities to learn. In the last few days, I’ve made some key changes to the design, tackling an impedance issue that was throwing the circuit off balance and refining the way the pedal handles power. It’s been another step in shaping the Twin Boost into the pedal it’s meant to be.
The buffer I’d originally designed for a buffered bypass worked beautifully on its own but struggled when paired with the Twin Boost circuits. Even with the addition of 7809 voltage regulators to give the buffer and the boost circuits their own stable 9V supplies, the two didn’t play nicely. The impedance mismatch between the two boost circuits was the source of the problem, and whilst the original plan to include the buffer could have solved the problem, the interaction between grounds of the twin boost and buffer took this solution out of the picture.
Why Hard Clipping Fixed the Impedance Issue
One side of the Twin Boost had hard clipping in its circuit; the other didn’t in this latest revision of the pedal, in an attempt to clean up the tone. This imbalance created an impedance mismatch that caused instability when the two sides interacted. After researching and testing, I decided to return to a hard clipping circuit with two 1N4001 diodes, and it worked exactly as I’d hoped.
Here’s why it worked:
Balancing the Output Impedance:
Hard clipping naturally reduces the output impedance by limiting how the signal interacts with the load. Adding this circuit brought the two sides of the Twin Boost into line, resolving the instability.Controlling Signal Peaks:
The 1N4001 diodes compress the big peaks in the signal, preventing overload and keeping the circuit stable. Since the 1N4001 diodes have a fairly high forward voltage (~0.7–1V), they only clip the larger peaks, leaving the smaller dynamics untouched. This keeps the compression subtle and avoids colouring the tone too much.Maintaining the Pedal’s Core Tone:
The hard clipping adds just enough control to smooth out the signal interaction without altering the mostly-clean, characterful boost tone I’ve worked so hard to refine. It’s a satisfying balance of function and sound.
The Role of the 7809 Voltage Regulators
Although the buffer didn’t make it into the final design, I’m leaving the 7809 regulators in place. One of their big advantages is that they allow the pedal to handle higher input voltages, up to 18V or more, while still regulating the output to a stable 9V.
This means the Twin Boost can work with a wider range of power supplies without risking damage to the circuits. Because the regulators bring the voltage down to 9V, the functionality of the circuits stays the same, but the extra flexibility is a nice bonus for players using higher-voltage supplies. It’s one of those behind-the-scenes features that adds robustness without needing to shout about it.
Reverting to True Bypass
With the impedance issue solved, I’ve decided to revert the pedal back to true bypass. While the buffered bypass idea was an interesting experiment, I think true bypass suits the Twin Boost’s design philosophy better. It keeps the signal path simple and avoids introducing unnecessary complexity.
That said, the work I’ve done on the buffer circuit hasn’t gone to waste. The buffer design worked brilliantly when tested as a standalone circuit, and I’m planning to offer it as an option for anyone who might want to incorporate it into their setup. Whether as a custom addition or part of a future project, it’s nice to know the design has potential beyond this one pedal.
What I’ve Learned
This part of the Twin Boost’s development has been a reminder of how every detail in a circuit can have a ripple effect. Adding the hard clipping diodes not only resolved the impedance issue but also made the pedal more stable and predictable overall. Meanwhile, the 7809 regulators have given the design an extra layer of flexibility, making it easier to integrate into different rigs.
What’s exciting about this process is how much it pushes me to understand the circuits I’m working with on a deeper level. From researching impedance matching to testing how components interact, it’s been a real mix of creativity and technical problem-solving. That’s what I love about designing pedals—it’s never just one thing; it’s all the parts working together.
The Twin Boost is getting closer to where I want it to be, and I can’t wait to share more as it comes together. If you’ve been following along, thanks for sticking with me through the ups and downs. As always, I’d love to hear your thoughts or questions—whether it’s about the hard clipping, the voltage regulation, or anything else, feel free to get in touch.
Stay tuned for more updates!

Building Versatility into the Twin Boost: A Buffered Bypass
Creating the Twin Boost’s mostly-clean, characterful boost was just the start. Making it versatile for any pedalboard setup meant tackling the challenge of buffered bypass, from designing a dual buffer circuit to solving power supply interference. Here’s how I approached it.
In the ongoing journey of developing the Twin Boost, my approach has always been hands-on, starting with existing designs and modifying them to explore new possibilities. This method, blending curiosity with problem-solving, has been instrumental in shaping my pedal designs.
The Twin Boost aims to deliver a mostly-clean yet characterful boost, featuring two independent channels and a direction toggle to switch the signal flow. Achieving the desired sound involved a journey of trial and error, understanding how different components influence tone, and researching the underlying physics to refine the design. The result is a boost that maintains clarity while adding its own distinctive flavour.
During testing, I noticed the Twin Boost performed optimally when following a buffered guitar signal. To ensure versatility across various pedalboard configurations, I decided to incorporate a buffered bypass. This would maintain signal integrity regardless of the pedal's position in the chain.
Designing a buffer to handle both the input and output seemed straightforward initially. However, integrating it with the Twin Boost's existing circuitry presented challenges. Testing the buffer independently with its own power supply yielded excellent results—transparent and stable. But when sharing the Twin Boost's 9V supply, the circuits interfered, disrupting the pedal's performance.
To address this, I plan to implement a 7809 voltage regulator for the buffer circuit, providing it with a dedicated, regulated 9V supply. This isolation should prevent interference between the buffer and the Twin Boost circuits. Additionally, incorporating decoupling capacitors will help stabilise the power supply, ensuring both circuits operate harmoniously.
This experience underscores the intricate relationship between creativity and technology in pedal design. Each challenge offers an opportunity to deepen my understanding of electronics and sound, reinforcing the importance of a hands-on, exploratory approach. As the Twin Boost evolves, I look forward to sharing further developments and insights from this journey.

(re)Designing the Twin Boost Pedal - part 2
After a year of refining, the Twin Boost has evolved. With a compact circuit, a cleaner boost free of hard-clipping, and fresh graphics that align with Hamilton Effects’ style, this redesign brings out the true character of your guitar and amp—especially when stacked with other effects.
After working on the Twin Boost for over a year, refining and tweaking, playing it live and seeing it come to life , I began to see where I could make it even better. This redesign is all about refining the Twin Boost’s core features, condensing its circuit, and enhancing its aesthetic appeal while keeping its original character intact.
Smaller Circuit, Same Power
One of my main goals for this redesign was to make the circuit board more compact without sacrificing the tonal versatility that players loved. Through a lot of trial and some interesting veroboard work, I was able to shrink down the circuit, making it easier to fit inside the enclosure and keep the same physical layout without it being such a squash. It’s a small change in size but a huge win in practicality.
A Cleaner Boost
While the original Twin Boost had a switchable hard-clipping circuit in the bias side for a more aggressive drive, I ultimately decided to remove it in this version. The new design focuses on delivering a cleaner boost without the clipping—ideal for more transparency and the ability to stack the pedal with other gain stages. With this cleaner boost, the character and nuance of your guitar and amp can shine through, at higher volumes, and the bias knob continues to change up the tone, especially when stacked.
Enhanced Aesthetics: new graphics
I’ve also worked on giving the Twin Boost a more defined look. Guitarists know that a pedal’s look often matters just as much as its sound, so I wanted the Twin Boost to visually stand out, and to have a design trend which can be built upon in future pedals, like the Embers Fuzz. The new graphics keep the foil-y brushed aluminium label that aligns with the pedal’s build and brand, combined with new knobs that hold up to serious use, the Twin Boost is now as reliable in appearance as it is in tone.
What’s Next?
This version of the Twin Boost has me excited for the future. I’m always open to further suggestions from fellow tone chasers, and I’m already experimenting with new tweaks and features for future iterations. As always, if you have any feedback or ideas, I’d love to hear from you!
Updated Key Features of the Twin Boost:
Compact circuit design
Cleaner boost with less clipping
New graphics and knobs
If you’re looking for a flexible, high-quality boost pedal, or if you’d like a custom design built around your own needs, feel free to get in touch with me at Hamilton Effects. The Twin Boost is evolving, and I’d love for you to be part of its journey.


Designing the Twin Boost Pedal
The first of my pedal circuit designs features two independent boost circuits—one with a gain control for added grit and the other with a bias control for shaping tone. It offers clean boosts to fuzzy overdrive, making it a very flexible pedal!
The Twin Boost pedal was the first pedal I ever designed, inspired by a concept my friend Pete and I wanted to explore - how two volume boost pedals, when stacked, could create drive. The idea was simple, the first pedal’s output becomes your gain control, and the second adjusts the overall volume. I wanted to explore this concept further and bring it into my own design.
Since I was just starting to learn pedal circuitry, the process was hands-on and involved a lot of experimentation with different components. After many trials, I ended up with the Twin Boost—a dual-boost pedal that offers two independent circuits. The first circuit has a gain control for adding grit, while the second has a bias control that adjusts the transistor’s response. This allows you to tweak the character of the boost, from a clean push to fuzz-like textures, especially at lower gain settings.
As someone who loves stacking low-gain pedals to create subtle variations in tone, the Twin Boost quickly became an essential part of my board. It’s designed to give a wide range of tonal options—from clean, transparent boosts to more saturated, overdriven sounds. With both sides engaged, the variety of tones on offer is huge. You can switch the order of the boosts for different results, and there’s a gain toggle on the bias side that adds a hard-clipping circuit for a more aggressive, rat-like drive.
Finding the right look for the pedal was a challenge - I was very aware quite how much guitarists buy with their eyes. You’d hope it’s all about tone, but the visual side of things really matters. I struggled to settle on a design I was happy with—I’d look at my pedalboard and try to find common themes in the pedals I liked visually, but there wasn’t much consistency to draw inspiration from. I went through a bunch of different knobs because the originals didn’t stay on well, and I’m planning to improve the labels with vinyl or foil stickers. I’ll share more pictures once I’ve landed on a final design.
Building the pedal was a bit of a journey. Much of it was done during late nights while my newborn twins were(n’t) asleep, which is why I named it the Twin Boost—two boosts, two babies.
Looking ahead, I’m already thinking about potential updates, like adding a tone control or maybe even an effects loop to allow other pedals to be inserted between the two boosts. But for now, the Twin Boost is a versatile, reliable boost pedal that I’m pleased to have created. It’s great for anyone who, like me, loves the flexibility of stacking low-gain pedals for different textures and sounds.
Key Features of the Twin Boost:
Two independent boost circuits for flexibility.
Gain control for adding grit and texture.
Bias control for shaping the transistor response and adding fuzz-like tones.
Option to switch boost order for different tonal results.
Gain toggle for hard-clipping distortion.
If you're interested in adding the Twin Boost to your pedalboard, or if you’d like to know more about my custom pedal builds, get in touch with me to discuss what you're after!


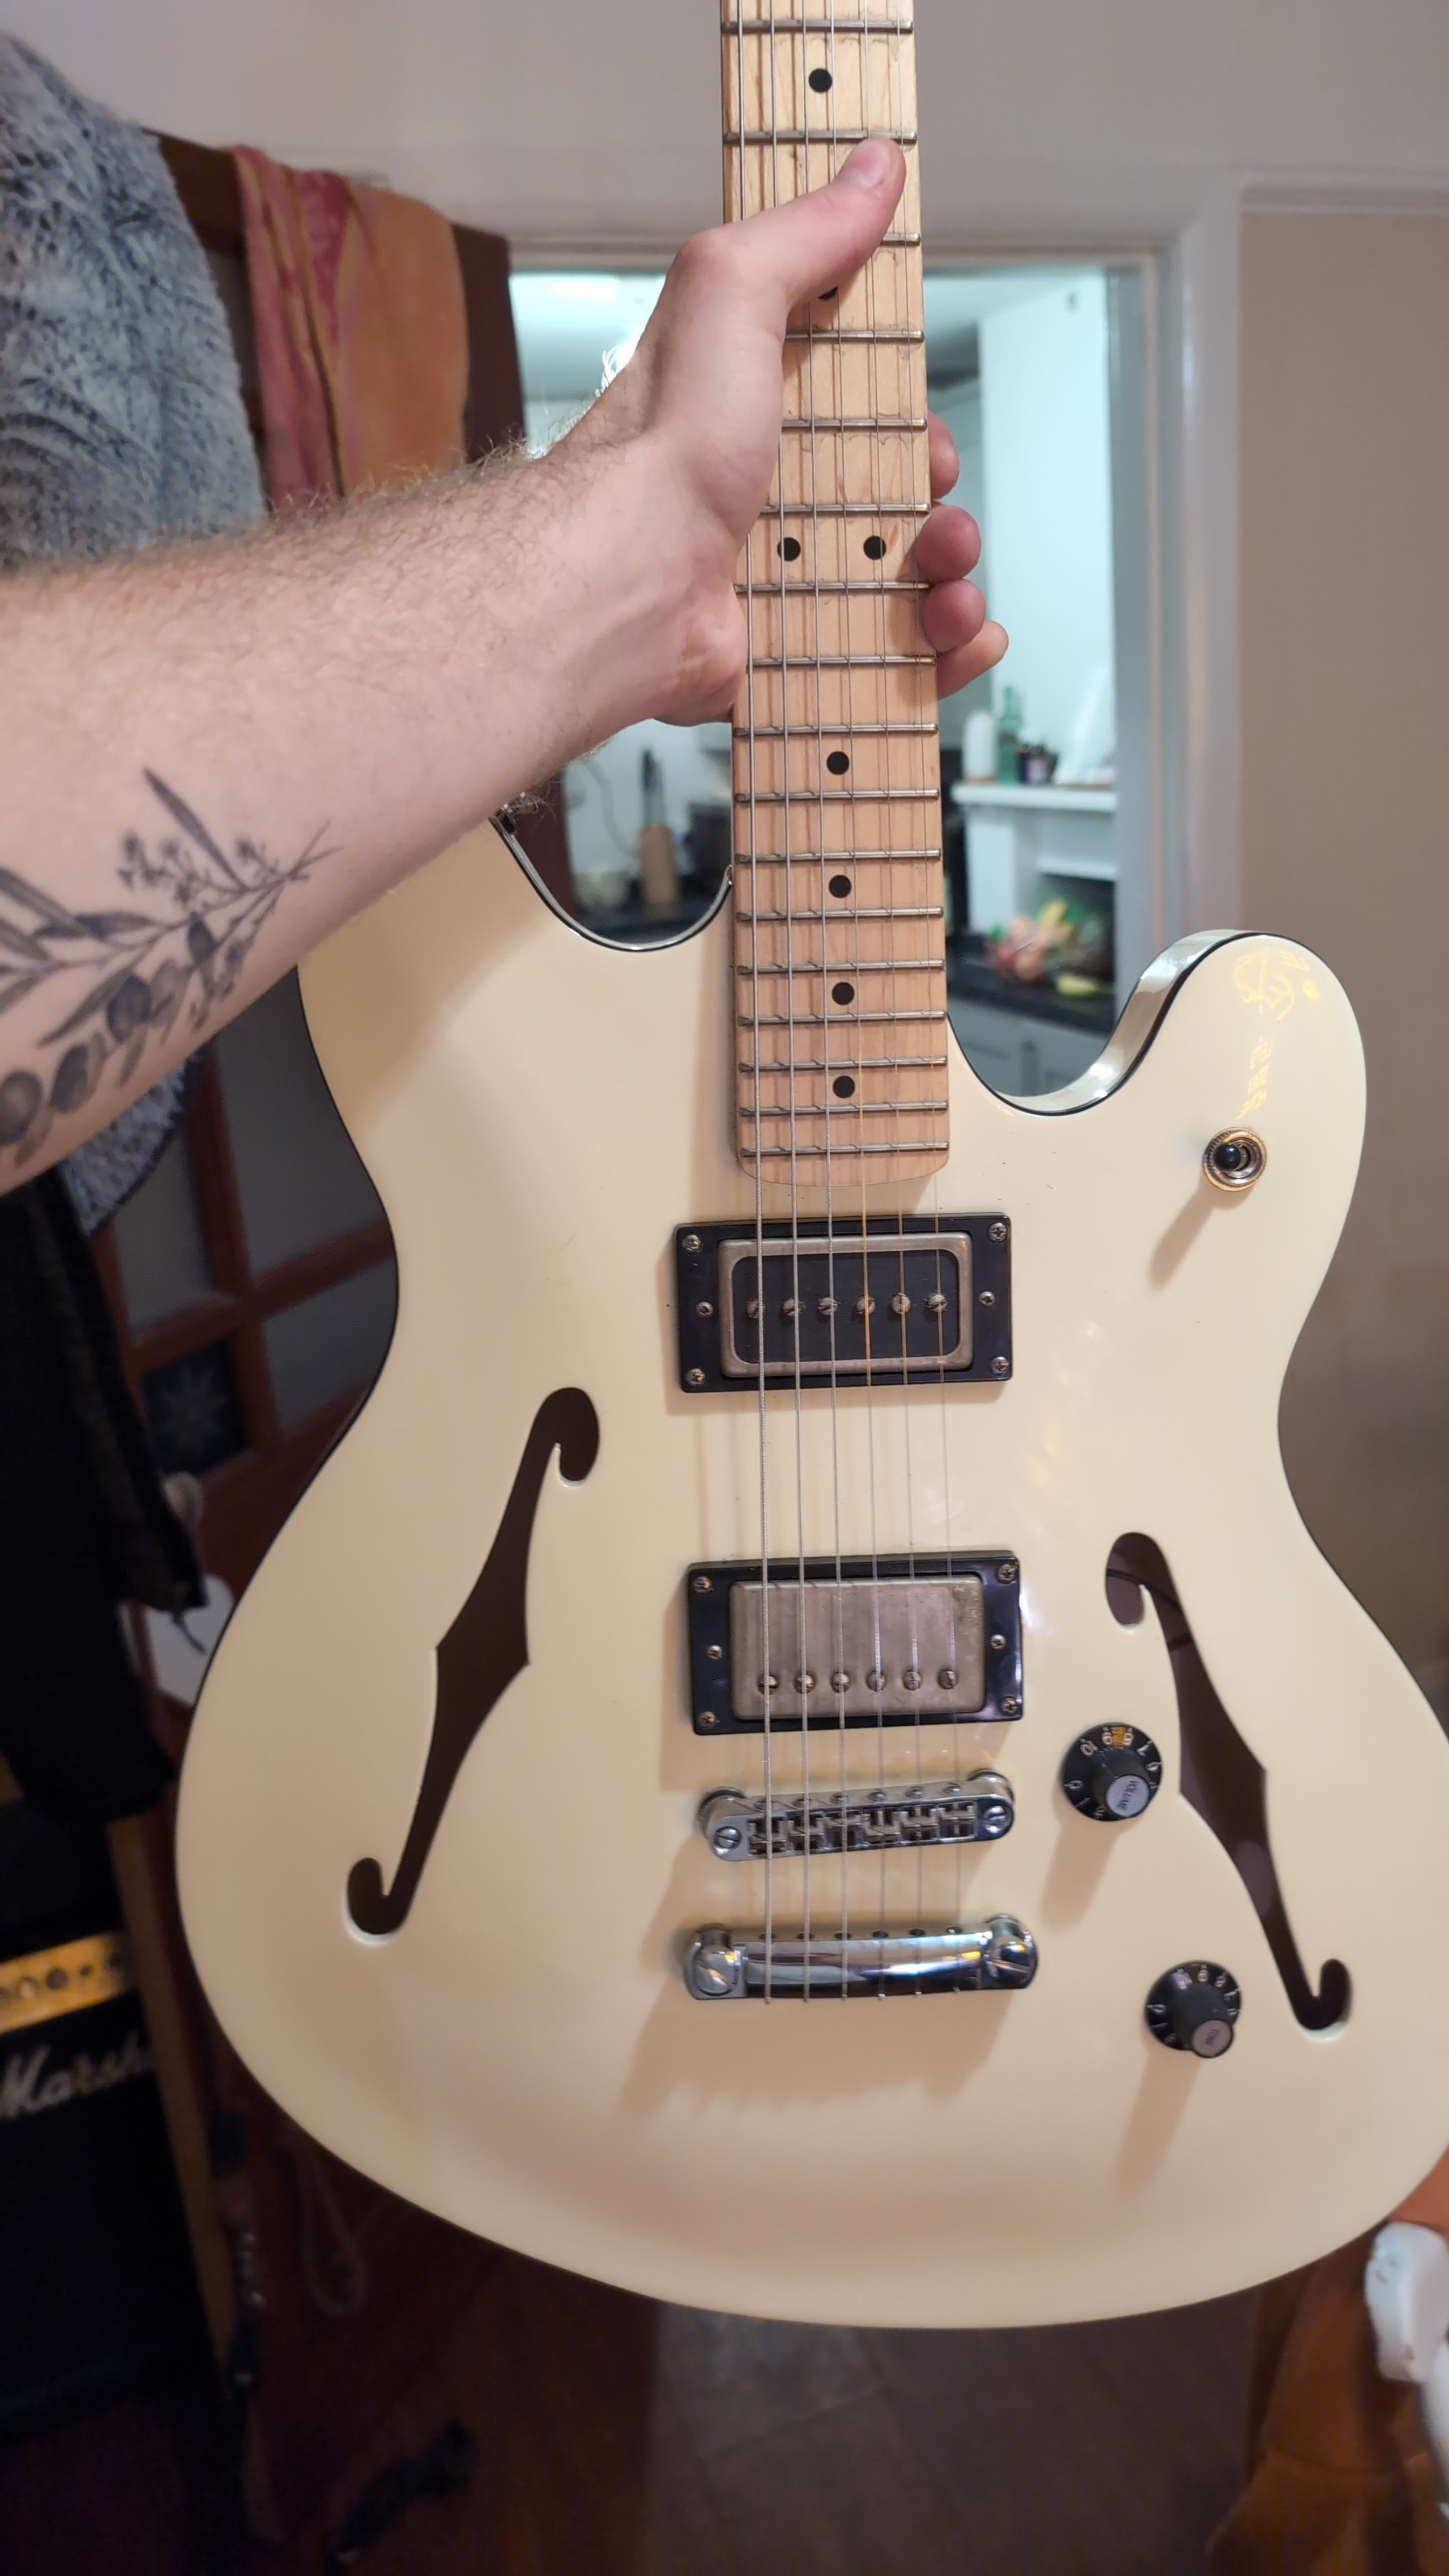
New pickups in a squier Starcaster
Transforming my Squier Starcaster with a PAF and a P90 for a brighter, more versatile sound
I recently upgraded the pickups in my Squier Starcaster, which originally had quite a dark, muddy sound from what felt like quite high output pickups. After trying a treble bleed mod using an orange drop capacitor and constantly running the guitar with the volume down to brighten things up, I still wasn’t fully satisfied with the tone. So, I decided to go with a Magneto Design Labs TT-59 (PAF-style pickup) in the bridge and a Power90 (humbucker sized P90) in the neck.
The TT-59 brings that classic PAF tone—clear and balanced, perfect for overdriven sounds. Meanwhile, the Power90 adds a P90-style warmth in the neck, offering a punchy tone with clarity that doesn’t get lost with gain.
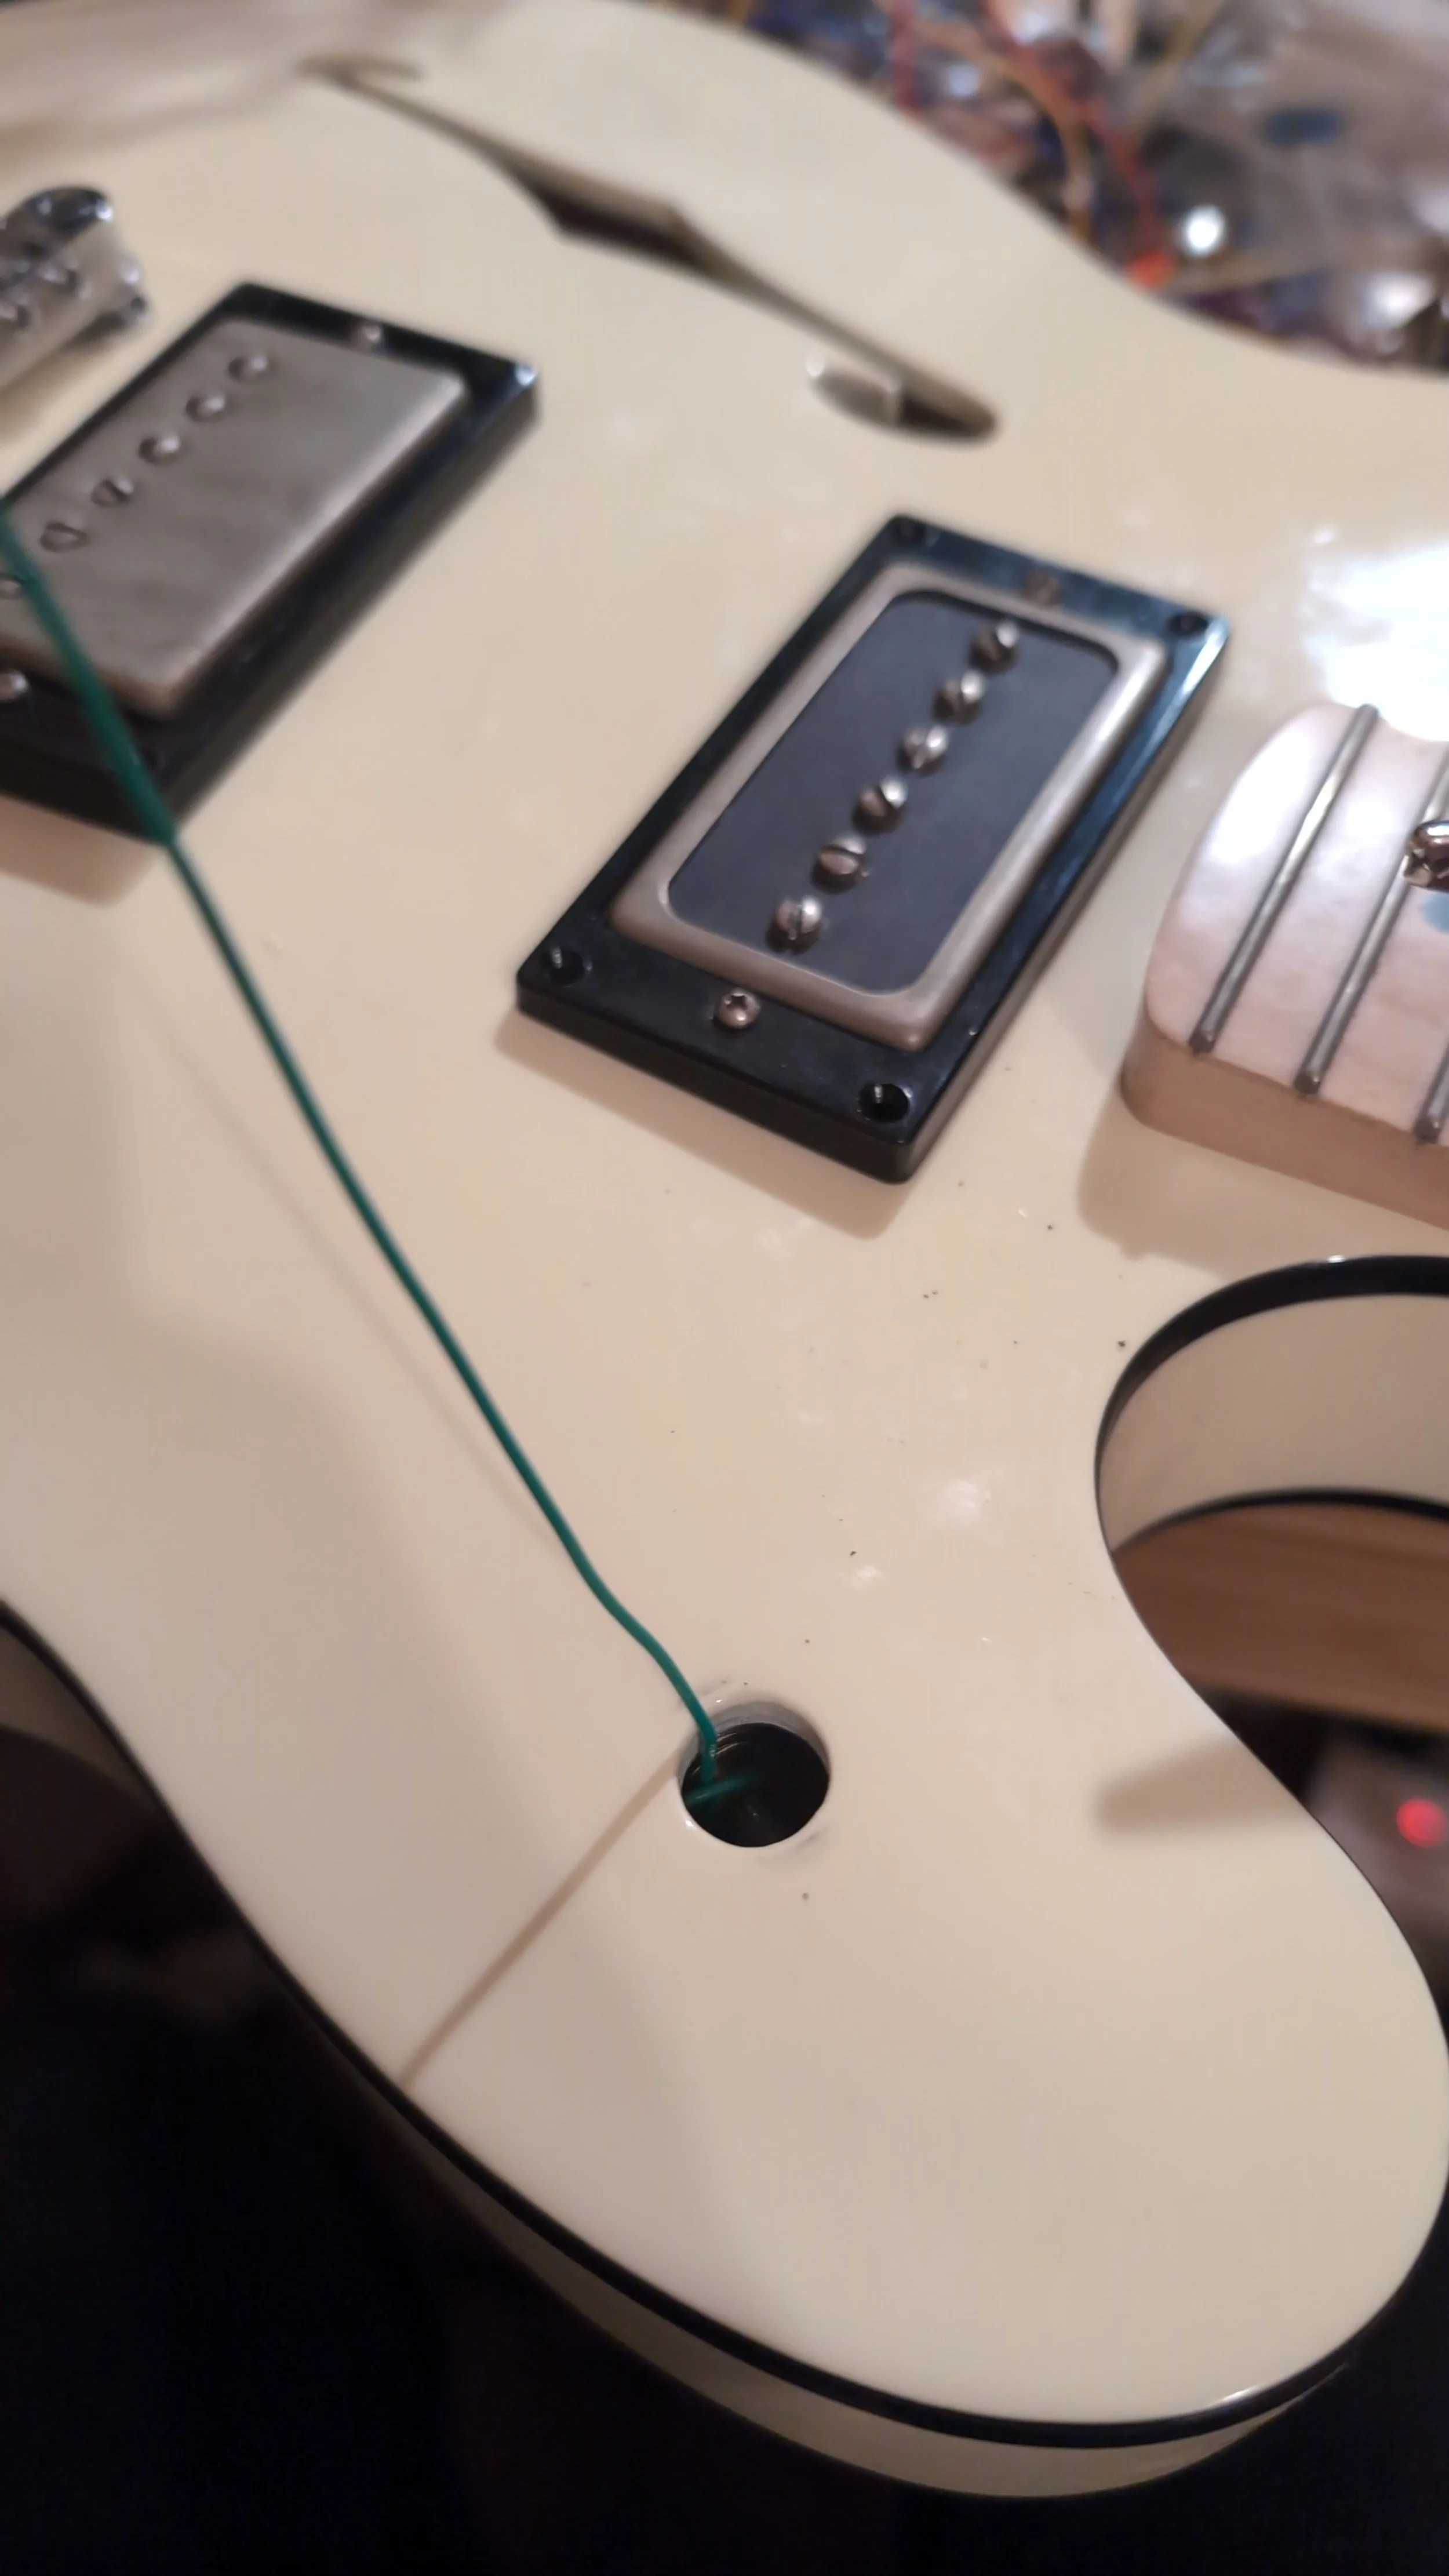
One of the more challenging aspects of working on semi-hollow guitars is dealing with the electronics. Since everything has to be accessed through the f-holes, getting the pickup switch out and back in can be a bit stressful. I used some spare wire to guide the switch back into place after installing the new pickups, which is a handy trick to avoid losing it inside the body.
After installing the new pickups, I decided to experiment with wrapping the strings over the bridge, a setup I enjoyed on a vintage Les Paul I recently played. The new pickups and this setup have completely transformed the guitar’s sound and feel, and I’m really looking forward to trying it live soon!


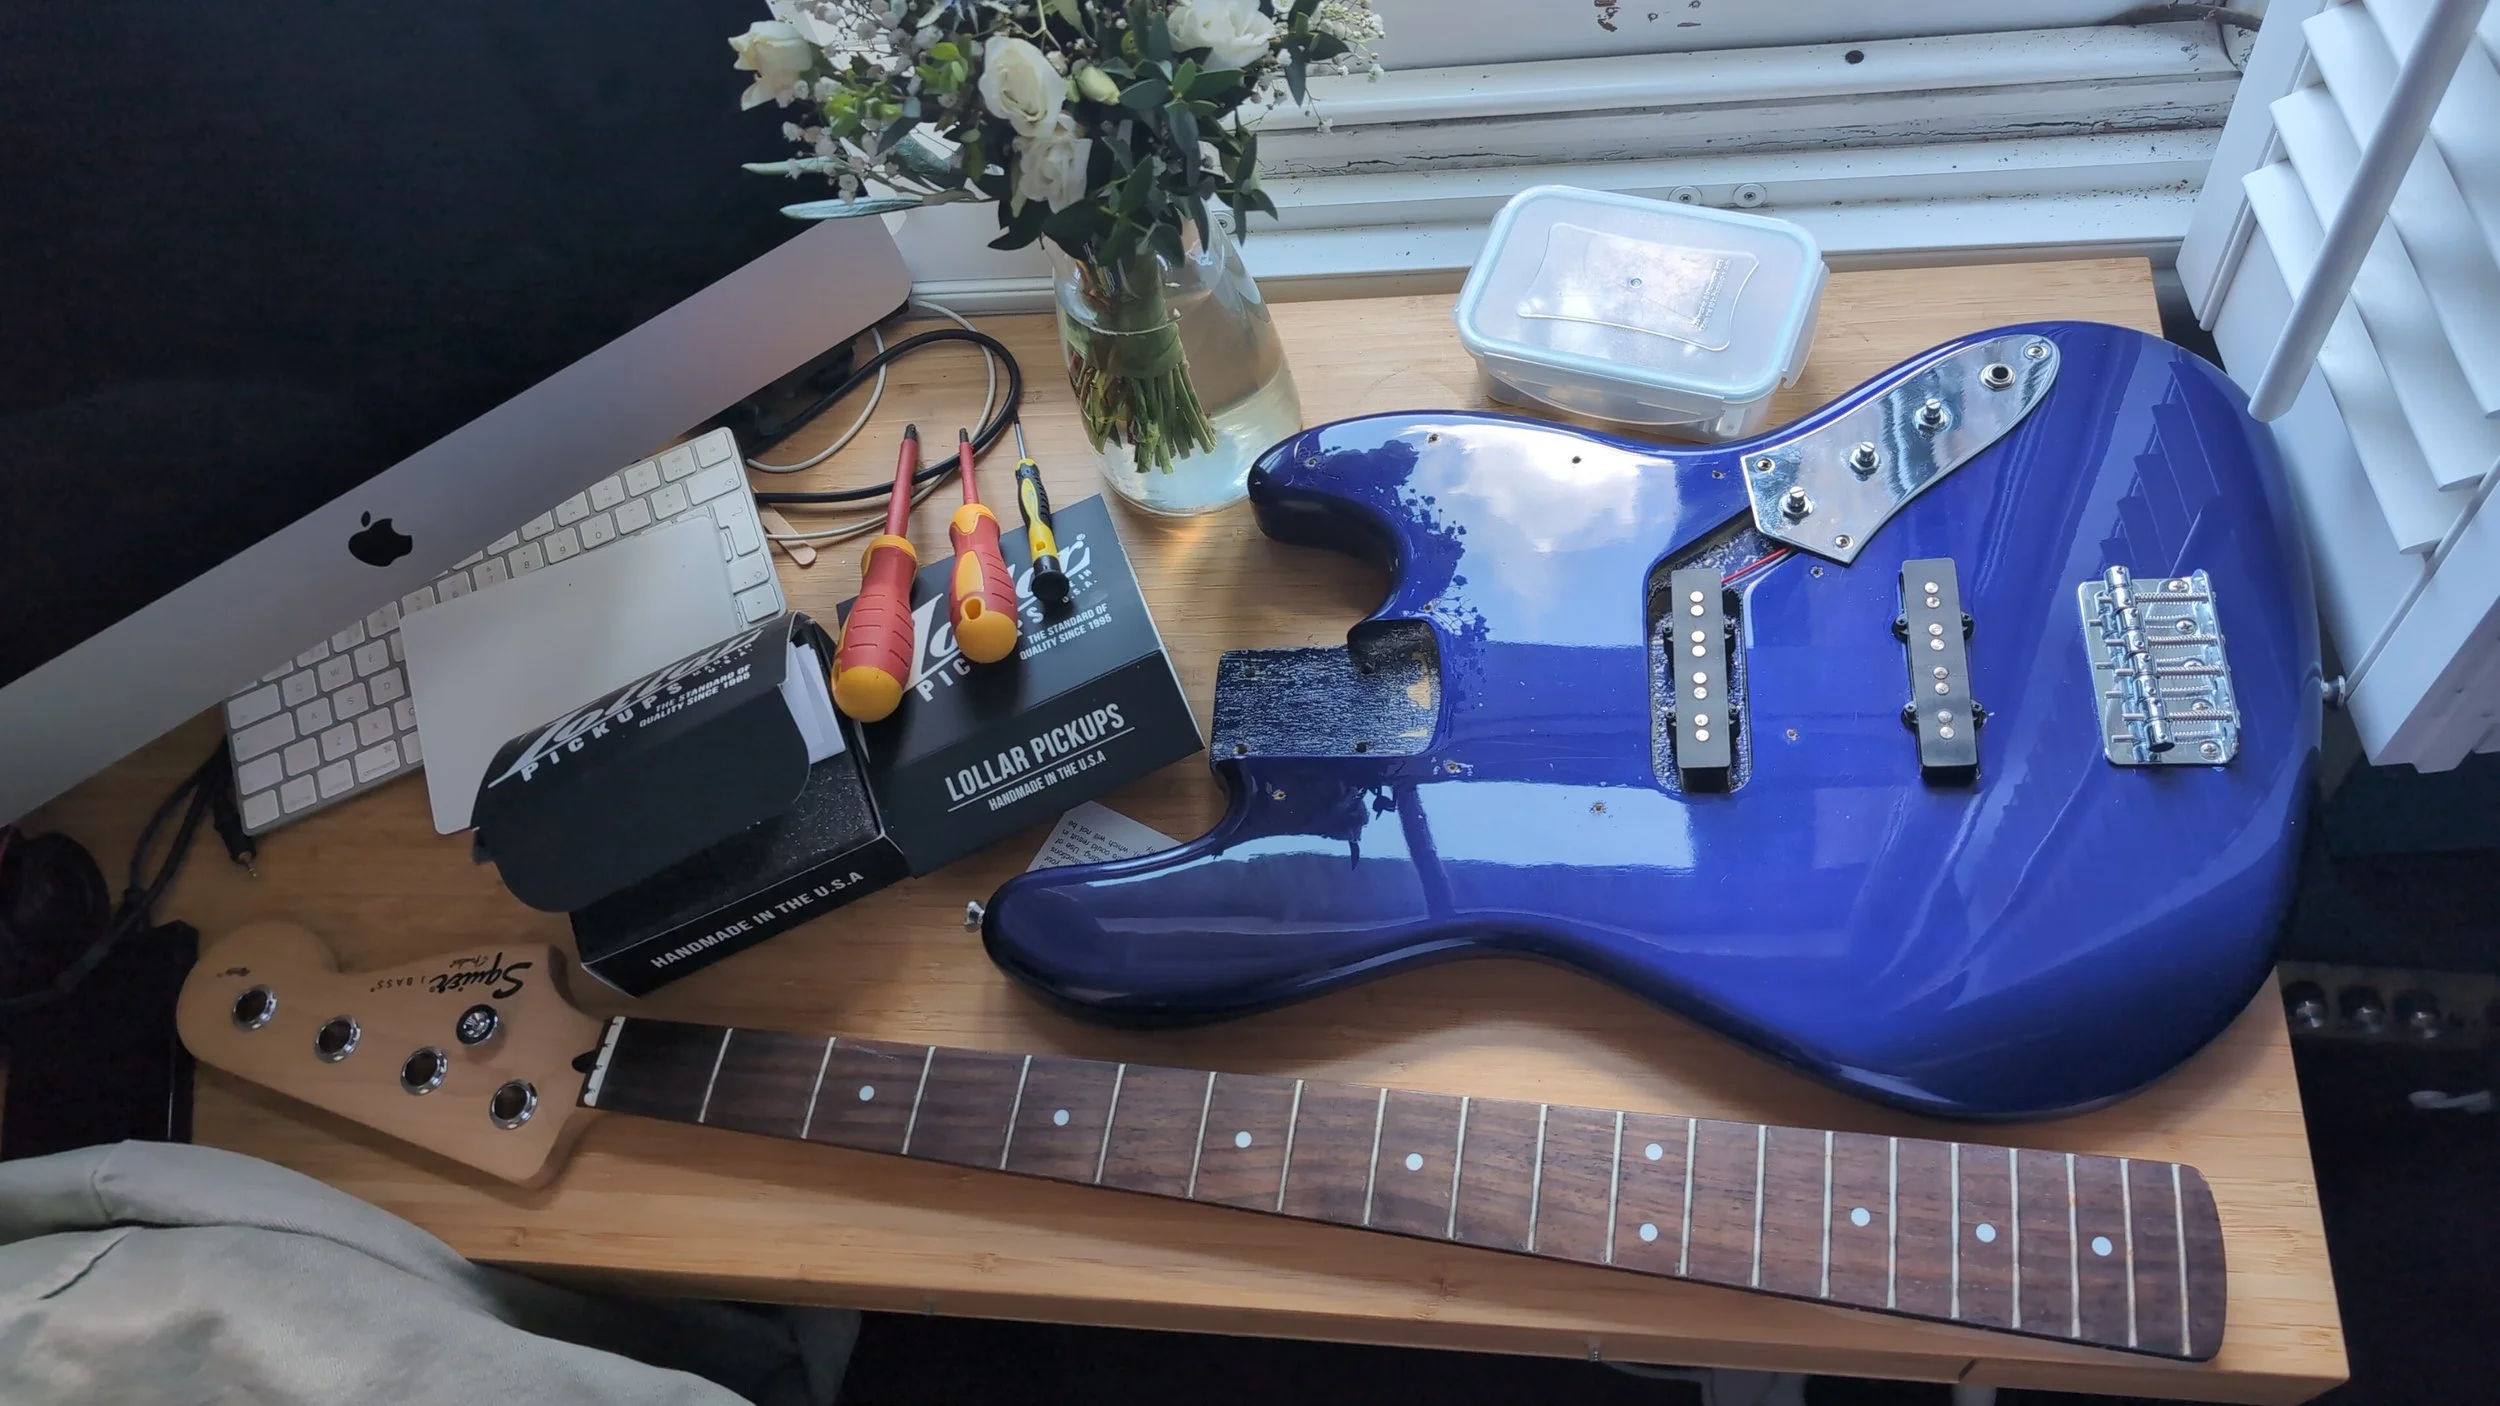
Upgrading a 2003 Squier Jazz Bass
Bringing a 2008 Squier Jazz Bass back to life with upgraded electronics, new tuners, and a fresh set of strings.
This project began with a well-loved, stock 2003 Squier Jazz Bass, a birthday gift for Ash, who’d owned it for over a decade. The bass had seen better days, with old strings that left residue on your fingers and a constantly slipped out of tune. First up, I swapped in Lollar pickups and installed a new custom wiring harness with CTS pots, a paper-in-oil tone cap and a switchcraft jack, bringing clarity and control to the tone. Next, I adjusted the truss rod and bridge height to fix the action, which was too high for comfortable play. After getting the action right, I replaced the original tuners with Schaller tuners to sort out the tuning instability. Once the new half-wound strings were on, I intonated the bass for precise tuning across the fretboard.
The frets also needed some love, so I gave them a thorough polish and conditioned the fretboard using Monty’s Montypresso. The owner had picked a mint green 3-ply scratchplate for the refreshed look, and I had to drill new holes to get it to fit the body. Along with tele-style knobs, it was a nice, subtle visual upgrade.
Having played in the band with the Ash since then, I can say it sounds great—he mentioned how it’s the perfect mix of the familiar bass he loves and the improvements it needed.


